
The Best Spelt Sandwich Bread (Bread Machine Recipe)

I never thought I’d be a bread machine person. It felt like one of those kitchen gadgets that would get used once and then live in the back of the pantry collecting dust.
Turns out I was completely wrong.
I make this bread every single week now. Sometimes twice a week because my family devours it that fast. My husband will literally hover near the counter waiting for it to cool enough to slice. It’s become the thing we all look forward to.
And here’s the best part – the bread machine does all the work. I’m talking maybe 5 minutes of actual effort on my end. That’s it.
Why Spelt?
Spelt is easier to digest than regular wheat and has a slightly nutty, sweet flavor that works perfectly for sandwich bread. It’s not too “healthy” tasting (you know what I mean) but it’s also not bland grocery store bread. It’s just really good bread that happens to be made with whole grain spelt.
My kids eat it without complaints. That alone is a win.
The Recipe
This makes one large loaf that fits perfectly in a standard bread machine pan and a 9×5 loaf pan if you’re doing the oven method.

Spelt Sandwich Bread
Print RecipeEquipment
Ingredients
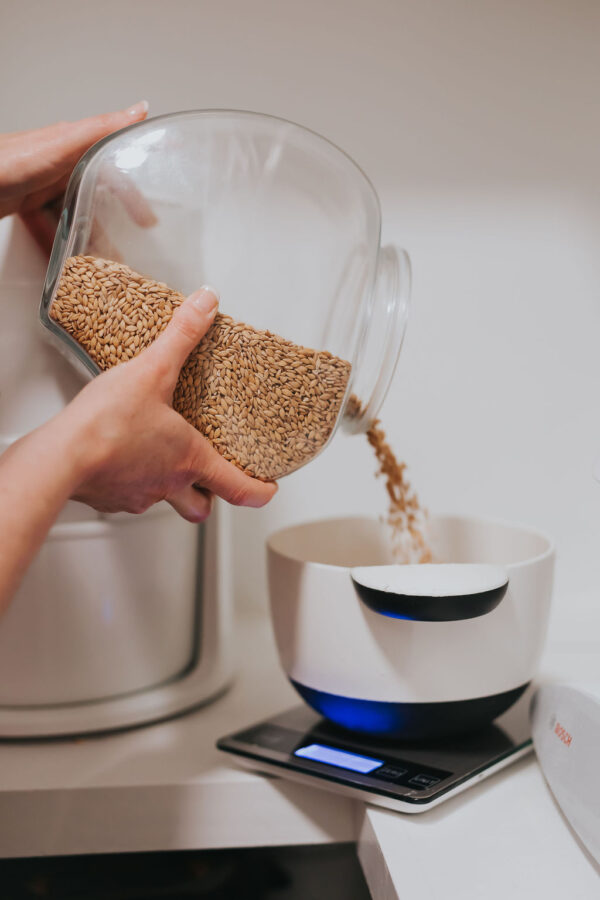
- 615 grams spelt berries ground into fresh milled flour
- 108 grams raw honey
- 56 grams olive oil
- 1 tbsp instant yeast
- 1 tbsp salt
- 193 grams whole milk raw whole milk or coconut milk
- 193 grams water
Notes
Instructions (Bread Machine Method)
This is how I make it every single week.- Add all ingredients to your bread machine (I layer them in this order: oil, honey, salt, milk, water, flour, yeast)
- Program your bread machine to these settings (or use the homemade/custom setting if your machine has one):
- Knead: 10 minutes
- First Rise: 1 hour
- Second Rise: 25 minutes
- Bake: 50 minutes
- Press start
- Walk away for about 2 hours and 25 minutes total
- Come back to fresh bread
Don’t Have a Bread Machine? Use Your Oven
If you don’t have a bread machine, you can still make this bread – you’ll just need to do a bit more hands-on work.- In a large bowl or stand mixer, combine all ingredients
- Knead for about 10-15 minutes (by hand or with dough hook) until the dough is smooth and elastic
- Place in a greased bowl, cover, and let rise in a warm spot for 1 hour until doubled
- Punch down the dough and shape it into a loaf
- Place in a greased 9×5 loaf pan
- Cover and let rise for another 25-30 minutes until it rises above the pan edge
- Preheat your oven to 350°F
- Bake for 35-40 minutes until the top is golden brown and it sounds hollow when tapped
- Let it cool in the pan for 15 minutes, then turn it out onto a wire rack
The Hardest Part
Waiting for it to cool before slicing. I know you want to cut into it immediately. I get it. But if you want clean slices that actually work for sandwiches, you need to let it cool completely. At least a couple hours. Put on a movie. Go for a walk. Distract yourself. It’s worth the wait.
What Makes This Recipe Work
The honey adds just enough sweetness without making it taste like dessert bread. The olive oil keeps it moist for days (if it lasts that long). The spelt gives it structure without being heavy or dense.
And the bread machine? It does all the kneading and rising work that would normally take up your entire afternoon. Five minutes of measuring ingredients and you’re done.
Storage
We go through this so fast that storage isn’t usually an issue, but if you need to keep it longer:
- Room temperature in a bread bag or wrapped in a kitchen towel: 4-5 days
- Refrigerator (it’ll last longer but can dry out): up to a week
- Freezer (slice it first so you can grab what you need): up to 3 months
The Bottom Line
This is the recipe that made me realize my bread machine wasn’t a waste of money. It’s probably my best kitchen purchase that I initially doubted.
The bread tastes better than anything I can buy at the store, costs less, and my family actually gets excited about sandwiches again. That’s about as good as it gets for a weekly staple recipe.
If you make it, let me know how it goes. And if your family demolishes it as fast as mine does, welcome to the weekly bread-making club.
i was given a bread machine for my bday last month and so happy for this recipe!!